Saturday, August 7, 2010
Battle Chronicler
Just heard about this program on the latest "View From the Veranda." It is called Battle Chronicler and it looks like a tasty program for creating graphic displays for your battle reports. I would love to use it but they don't offer a version for the Mac. Boo hoo!
WARMACHINE Mosh Pit
Another day of WARMACHINE Friday this time hosted at Mi Casa. It was the second time that we got to use my custom made 4' by 4' board and it looked great. The combatants in this battle were Khador led by Vlad and Cygnar led by Haley.
Khador consisted off Vlad, six Iron Fang Pikemen with Officer and Standard Bearer, Greylord Ternions, four Mechanics, Man-O-War Kovnik and three 'Jacks: Juggernaut, Spriggan and Marauder. Cygnar brought Haley, full unit of Sword Knights with Officer and Standard Bearer, three Storm Lances, three Storm Smiths and three 'Jacks: Stormclad and two Lancers.
The Mosh Pit scenario requires that an army must hold the center circle (diameter 16") with no opposing models within the circle beginning at the end of the third turn. Khador deployed first. Spriggin on left flank, Marauder and Kovnik on the right and the rest a hard little knot in the middle. Cygnar deployed the Storm Lances on their left flank along with a Storm Smith and Lancer. Right flank consisted of another Storm Smith and Lancer. The rest of the army with spread out in the middle.
First turn saw Khador moving forward in shield wall being covered with blizzards from the Greylords. Flanking 'Jacks either ran or charged forward. Cygnar's turn saw them moving forward also and ranging out on their left flank with the Storm Lances with a big hunk of impassable terrain between them and the bulk of the Khador army. An arcane shield spell was cast on the Storm Blades as they moved up the middle.
Second turn and the Khador army tried to surge forward. Vlad went first and popped his feat and cast signs and portents for what I thought would be some good melee. Kovnik successfully attempted to drive his Marauder and added an extra die on attack. Juggernaut moved to intercept and harry the Storm Lances. Spriggen moved forward and sent off a couple of grenades, one taking out a Storm Smith on the right flank and put a serious hurt on the Lancer on the left (with boosted damage.) Iron Fangs moved forward in their knot, Greylords threw more blizzards on the Iron Fangs. Mechanics just stayed behind the Iron Fang wall with Vlad. The Marauder was last and I thought it was going to be great. It was probably ten inches away from the Lancer on the right flank and I thought I was going to charge in and combo slam him away. Wrong! I didn't realize that Vlads feat only affected those 'Jacks in his battlegroup and since the Marauder was marshaled by the Kovnik I was screwed. All it could do was move forward eight inches and look menacing. Cygnar continued the dance by moving up the Storm Smith on the left flank and disrupt the Spriggin. The accompanying Lancer moved back behind an obstruction. Haley moved through some woods and popped her feat, giving every model in her control area another attack as well as arcing chain lighting through the Lancer on their right flank. The lightning hit the Spriggin easily but caused no damage and then arced into the Iron Fangs and another five models. Paul had some terrible damage rolls and I think only managed to kill one Pikeman. The Lancer on the right moved into melee with the Marauder, doing some cortex damage with the shock shield as well as giving a poke with his spear. The middle Storm Smith tried to blast an Iron Fang but missed. The Stormclad charged at the Marauder and did significant damage with that giant sword and pimp slapped it with the open fist. The Storm Blades received the assault order and charged at the Iron Fangs. Only one of them got into melee with the disrupted Spriggin but the assault order allows them to use their ranged weapons as part of a charge. Surprisingly the Spriggin gets pretty well beat up by the storm glaives, two columns of hull damage as well as taking out the shield on the melee strike. The rest of the storm glaive shots either missed or did no damage to the Pikeman, I think taking out one more. More poor rolls for Paul. The Lancers swooped around their left flank and one got to safely engage the Juggernaut with reach and did a little damage, knocking of some bolts and scraping the paint.
Round three! Vlad again moved up and cast signs and portents. The Kovnik moved forward a little and blasted a Storm Lance with his shield cannon. The Marauder did a little something to the Stormclad but not as much because of a crippled arm. Juggernaut moved into a Storm Lance and hacked him down. Greylords moved up and did a spray attack on some of the Storm Blades killing two of the three. Spriggin just hammered the Storm Blade in melee with it, spitting him on his war lance. Then the Iron Fangs charged in and decimated the remaining Storm Blades. On Cygnars turn there wasn't much to do. The Stormclad finished off the Marauder, leaving a pile of scrap. The Storm Lance, I think, charged into the Juggernaut doing some more damage. The Lancer on Cygnar's left moved forward and arced chain lighting onto Vlad, doing him three damage and then it proceeded to jump around and kill most of the mechanics. A Greylord was taken down by a Stormsmith and the second Stormsmith took out another mechanic.
Round four. Looking at the board Cygnar only had two models in the mosh pit, the last Stormblade and the Stormsmith. From there it was rather easy to finish them off and secure the victory.
Thoughts: Paul, get rid of those GF9 faction dice! Those things let you down at the critical moments! I have been trying to play Khador simply, move forward and don't worry about losing troops. I did have some traffic control problems in the back during the first two turns but that is to be expected when the board is crowded with terrain. Not understanding fully how Vlad's feat worked caught me off guard. The mechanics are a big deal. Since MKII I have fielded them in most every list and they never let me down. Just enough repair to keep the 'Jacks going. The first time that the Kovnik did something and didn't die. I like the way that 'Jack marshal works now especially with the Kovnik's drive ability. The Iron Fangs are becoming my go to unit. They have great survivability in shield wall and the movement to balance out the slow 'Jacks when it comes to threatening areas of the board. Plus with the Officer and Standard Bearer they are a tough nut to crack.
To be fair to Cygnar, the strategy was sound. If the lightning would have been more effective on the Iron Fangs it would have been more of a game.
Khador consisted off Vlad, six Iron Fang Pikemen with Officer and Standard Bearer, Greylord Ternions, four Mechanics, Man-O-War Kovnik and three 'Jacks: Juggernaut, Spriggan and Marauder. Cygnar brought Haley, full unit of Sword Knights with Officer and Standard Bearer, three Storm Lances, three Storm Smiths and three 'Jacks: Stormclad and two Lancers.
The Mosh Pit scenario requires that an army must hold the center circle (diameter 16") with no opposing models within the circle beginning at the end of the third turn. Khador deployed first. Spriggin on left flank, Marauder and Kovnik on the right and the rest a hard little knot in the middle. Cygnar deployed the Storm Lances on their left flank along with a Storm Smith and Lancer. Right flank consisted of another Storm Smith and Lancer. The rest of the army with spread out in the middle.
First turn saw Khador moving forward in shield wall being covered with blizzards from the Greylords. Flanking 'Jacks either ran or charged forward. Cygnar's turn saw them moving forward also and ranging out on their left flank with the Storm Lances with a big hunk of impassable terrain between them and the bulk of the Khador army. An arcane shield spell was cast on the Storm Blades as they moved up the middle.
Second turn and the Khador army tried to surge forward. Vlad went first and popped his feat and cast signs and portents for what I thought would be some good melee. Kovnik successfully attempted to drive his Marauder and added an extra die on attack. Juggernaut moved to intercept and harry the Storm Lances. Spriggen moved forward and sent off a couple of grenades, one taking out a Storm Smith on the right flank and put a serious hurt on the Lancer on the left (with boosted damage.) Iron Fangs moved forward in their knot, Greylords threw more blizzards on the Iron Fangs. Mechanics just stayed behind the Iron Fang wall with Vlad. The Marauder was last and I thought it was going to be great. It was probably ten inches away from the Lancer on the right flank and I thought I was going to charge in and combo slam him away. Wrong! I didn't realize that Vlads feat only affected those 'Jacks in his battlegroup and since the Marauder was marshaled by the Kovnik I was screwed. All it could do was move forward eight inches and look menacing. Cygnar continued the dance by moving up the Storm Smith on the left flank and disrupt the Spriggin. The accompanying Lancer moved back behind an obstruction. Haley moved through some woods and popped her feat, giving every model in her control area another attack as well as arcing chain lighting through the Lancer on their right flank. The lightning hit the Spriggin easily but caused no damage and then arced into the Iron Fangs and another five models. Paul had some terrible damage rolls and I think only managed to kill one Pikeman. The Lancer on the right moved into melee with the Marauder, doing some cortex damage with the shock shield as well as giving a poke with his spear. The middle Storm Smith tried to blast an Iron Fang but missed. The Stormclad charged at the Marauder and did significant damage with that giant sword and pimp slapped it with the open fist. The Storm Blades received the assault order and charged at the Iron Fangs. Only one of them got into melee with the disrupted Spriggin but the assault order allows them to use their ranged weapons as part of a charge. Surprisingly the Spriggin gets pretty well beat up by the storm glaives, two columns of hull damage as well as taking out the shield on the melee strike. The rest of the storm glaive shots either missed or did no damage to the Pikeman, I think taking out one more. More poor rolls for Paul. The Lancers swooped around their left flank and one got to safely engage the Juggernaut with reach and did a little damage, knocking of some bolts and scraping the paint.
Round three! Vlad again moved up and cast signs and portents. The Kovnik moved forward a little and blasted a Storm Lance with his shield cannon. The Marauder did a little something to the Stormclad but not as much because of a crippled arm. Juggernaut moved into a Storm Lance and hacked him down. Greylords moved up and did a spray attack on some of the Storm Blades killing two of the three. Spriggin just hammered the Storm Blade in melee with it, spitting him on his war lance. Then the Iron Fangs charged in and decimated the remaining Storm Blades. On Cygnars turn there wasn't much to do. The Stormclad finished off the Marauder, leaving a pile of scrap. The Storm Lance, I think, charged into the Juggernaut doing some more damage. The Lancer on Cygnar's left moved forward and arced chain lighting onto Vlad, doing him three damage and then it proceeded to jump around and kill most of the mechanics. A Greylord was taken down by a Stormsmith and the second Stormsmith took out another mechanic.
 |
| Cygnar's turn (round three) |
Thoughts: Paul, get rid of those GF9 faction dice! Those things let you down at the critical moments! I have been trying to play Khador simply, move forward and don't worry about losing troops. I did have some traffic control problems in the back during the first two turns but that is to be expected when the board is crowded with terrain. Not understanding fully how Vlad's feat worked caught me off guard. The mechanics are a big deal. Since MKII I have fielded them in most every list and they never let me down. Just enough repair to keep the 'Jacks going. The first time that the Kovnik did something and didn't die. I like the way that 'Jack marshal works now especially with the Kovnik's drive ability. The Iron Fangs are becoming my go to unit. They have great survivability in shield wall and the movement to balance out the slow 'Jacks when it comes to threatening areas of the board. Plus with the Officer and Standard Bearer they are a tough nut to crack.
To be fair to Cygnar, the strategy was sound. If the lightning would have been more effective on the Iron Fangs it would have been more of a game.
Tuesday, August 3, 2010
Dual Session--WARMACHINE & Combat Commander
Paul and I played a game of WARMACHINE on Friday the 30th of July. The 35 point throwdown was between Khador and Cygnar and the scenario was Break The Line. We had decided to play fully painted armies after the introduction of MKII came out in the spring and what a great feeling to see all the models on the table with some fabulous terrain. Allister Caine took the field against Kommandant Irusk with the goal of holding three of six quadrants on the board at the end of the third round. Khador deployed as a hard little knot in the center of the board with Iron Fang Pikemen and a Demolition Man-O-War unit accompanied by Irusk. On the left flank the Winter Guard and a Destroyer held vigil. The right flank was occupied by Widowmakers and a Manhunter.
Caine set up with most of his forces spread out evenly across the front of his deployment zone. There was two units of Arcane Tempest Gun Mages, three Hunters (!) and two Gun Mage solos, as well as the Black 13th. It looked grim for the Khador army as they had no long range weapons (just range 8" blunderbusses) besides the Destroyer. The only hope was to move forward as fast as possible and hope to get to grips with Cygnar before they were all shot to hell. And that is basically what happened.
On the first turn all of Khador advanced. Most with some sort of defensive buff. Man-O-War under Iron Flesh, Iron Fangs with Shield Wall and Winter Guard with Bob and Weave. Cygnar also moved forward but a little bit more warily, trying to use what cover they could, still pretty spread out. Khadors big mistake was deploying the Destroyer so far from Irusk as he had to run back in order to be granted the spell of Superiority from his 'caster. Second round saw the Widowmaker taking some shots at the Hunter on their flank, causing only one point of damage with their Sniper ability. I thought that they would be able to benefit from their Camouflage skill but the Gun Mage unit benefitted from True Sight. Within a turn they would be destroyed to a man, although their true purpose was to tie-up the Hunter and the Gun Mage unit. The Gun Mages on the left flank took out a good number of Winter Guard although it would have been more if the Kovnik Joe hadn't given them the tough ability. Additionally, some of the shots of the Hunter got through to kill off a couple of the Man-O-War unit. Caine also arrived in the second round and activated his feat, taking shots at everyone in line of sight although that nuber was decreased significantly by a cloud effect thrown out by a member of the Black 13th. Third round saw Cygnar taking possession of some of the zones of control, if only for their part of the turn. Khador continued their advance forward and got into charging range of some of the Hunters and one of the Gun Mage units. They did a good job of knocking down a 'jack and eliminating some of the Gun Mages. After their charge they regrouped thanks to the help of the standard bearer and sat tight in Shield Wall. The Winter Guard did a good job of knocking out some their opponents, the second Gun Mage unit. After this round, the center was looking weak for Cygnar as well as having some fraying around the edges. Cygnar tried a little something on their turn and then ceded the battle to Khadors overwhelming melee units.
Thoughts on this game: Khador did a good job on set-up in that they threatened most parts of the board equally. Key if you want to keep your opponent from discerning your true goals. Also learned was that units really need some sort of attachment, preferably the officer and standard bearer. A character solo doesn't hurt either. Both of them are used to increase the inherent abilities of the unit and make them pack a bigger punch and defend with greater acumen. The other thing that I learned was that tier list (which Paul used) are very specialized. They give you some good zing in specific situations but they have some very big weaknesses. Once I engaged Cygnar in melee they were pretty much done because of the preponderance of weak melee models. For the most part I think that a balanced list is best although that will not stop me from fielding a tier list. They are just so "fluffy" and the story aspect of one of the things that drew me into the game in the first place.
Later on in the evening we played two games of Combat Commander. We have been taking great delight in the scenarios in the new Normandy battlepack. This time say the Germans opposed first by the British and second by the Canadians. The first was a beach breakout by the British. They were aided in their approach by well placed smoke rounds before the game started. This and timely draws of the Recovery order allowed the first sortie to quickly leave the beach assault a bunker. Taking the bunker involved also killing an officer and taking out an artillery piece. Once in the bunkers and trenches the British had litte trouble finishing off the old men and boys that the Krauts chose to man their defenses. Fortuitous weapon breakage and poor, poor defense/offense draws helped the British in their inexorable advance.
The second scenario saw elite German troops marching on an urban area held by mediocre Canadian forces. This time the pendulum swung the way of the Germans. The Canadians couldn't draw a decent defense card to literally save their lives. The Germans executed a text book advance-and-flank maneuver and it was over rather quickly through surrender.
Thoughts on these games: When attacking it is important to have several Move and Recovery orders. Units are more likely to be broken when moving and it is essential to get them recovered before they take more fire. Conversely, when defending, it is critical to be able to fire to stop troops but even more critical to finish them off once they are broken. This speaks well of fire groups that contain a mortar. If the mortar can break some units then you can clean them up with unit or weapon fire. Another point to remember, if you have the chance, have some Ambush actions in your hand before you try an Advance. This allows easy clearing of enemy when you go to engage them hand-to-hand.
 |
| Khador at setup |
 |
| Cygnar at setup |
Thoughts on this game: Khador did a good job on set-up in that they threatened most parts of the board equally. Key if you want to keep your opponent from discerning your true goals. Also learned was that units really need some sort of attachment, preferably the officer and standard bearer. A character solo doesn't hurt either. Both of them are used to increase the inherent abilities of the unit and make them pack a bigger punch and defend with greater acumen. The other thing that I learned was that tier list (which Paul used) are very specialized. They give you some good zing in specific situations but they have some very big weaknesses. Once I engaged Cygnar in melee they were pretty much done because of the preponderance of weak melee models. For the most part I think that a balanced list is best although that will not stop me from fielding a tier list. They are just so "fluffy" and the story aspect of one of the things that drew me into the game in the first place.
Later on in the evening we played two games of Combat Commander. We have been taking great delight in the scenarios in the new Normandy battlepack. This time say the Germans opposed first by the British and second by the Canadians. The first was a beach breakout by the British. They were aided in their approach by well placed smoke rounds before the game started. This and timely draws of the Recovery order allowed the first sortie to quickly leave the beach assault a bunker. Taking the bunker involved also killing an officer and taking out an artillery piece. Once in the bunkers and trenches the British had litte trouble finishing off the old men and boys that the Krauts chose to man their defenses. Fortuitous weapon breakage and poor, poor defense/offense draws helped the British in their inexorable advance.
 |
| The Canadians surrounded! |
Thoughts on these games: When attacking it is important to have several Move and Recovery orders. Units are more likely to be broken when moving and it is essential to get them recovered before they take more fire. Conversely, when defending, it is critical to be able to fire to stop troops but even more critical to finish them off once they are broken. This speaks well of fire groups that contain a mortar. If the mortar can break some units then you can clean them up with unit or weapon fire. Another point to remember, if you have the chance, have some Ambush actions in your hand before you try an Advance. This allows easy clearing of enemy when you go to engage them hand-to-hand.
Monday, July 26, 2010
All Things Zombie
 |
| Opening the box on another great game. |
 |
| Surviving the horde. |
This game is a lot of fun as you get to control a "star" and several of their friends in order to survive the zombie horde. Each character comes with a special trait or power that can help your survival so the challenge is how to work all the characters together for the common good. The star has some special rules that make them a little bit more durable and they can also help to motivate other characters. The mechanics of the game works almost the same as the tabletop version of the game so if you know how to play that you will easily adapt to this. To be totally honest I think that this version of the game is a little bit more streamlined and easy to understand, especially since the rules are laid out in a way that allows easy understanding. Although I did notice a couple of terms that were used interchangeably that might confuse some people.
Sunday, July 25, 2010
Combat Commander Plays
 |
| Assaulting from the beach. The Americans have driven the Germans back from the left flank. |
For example: In the second match in the bocage, the Americans tried to move across a road, through bocage and into a field. They were having no success and getting hosed down by the Germans and the casualties were mounting fast, approaching the surrender level. During one of the defense rolls the Americans get the reinforcement event and pick the 155mm radio. At this point the momentum radically changes and the Americans start calling fire down on the Germans with devastating effect. Add the radio to the fact that the American's had a leader that could activate like a hero so he was calling multiple Artillery Request orders on the same turn. The whole lynchpin of that episode was a random event card....
Continued thoughts about Combat Commander: 1.) If you are attacking you must have a general plan. This forces you to cycle through cards until you have what you need to put the plan into action. For instance, if I want to move a mass of troops forward I like to have a Move order, a Recover order and maybe an Assault Fire action in my hand. I don't like to move guys into or across enemy firelanes unless I have a Recover order in my hand because I always get gunned down. 2.) Tactical flexibility. Like Kenny said, "You have to know when to hold 'em.." Sometimes if you aren't getting the cards you want you must formulate a plan around what you have. This can put your troops in a tight spot with fewer options but there are times when you just have to keep your troops moving rather than hunkering down under a withering barrage of bullets. Hand management is huge in this game.
I continue to find this game intriguing and coming back for more. I think this game is getting close to surpassing WARMACHINE in plays. I also like it because you can pull it off the shelf and get to playing and 15 minutes rather than the large setup of WARMACHINE and the transport of all the models.
Thursday, July 22, 2010
Men of Iron

Men of Iron by GMT was the next wargame on our list. After delving into Warriors of God I was ready for another challenge to my personal wargaming sensibilities. Men of Iron did not disappoint. The game started with the Flemish defending against the French. Set-up was pre-determined by the scenario and it had a couple of small rules variation specific to the set-up, such as the French knights could be pulled down if taking a negative result while being in a ditch. I wasn't really sure about what I was supposed to do so I ended up passing for the first couple of rounds waiting for the French to come into my troops. This was a big mistake that will be explained later.
 |
| The beginning... |
 |
| It is the Towers fault! |
 |
| The End is near! |
This a fairly good game with a lot to think about tactic-wise. At first, I didn't want to play again but that was just the tears of defeat clouding my thinking. I would just want to go into the next game a little bit more deliberately than I did the first play. Now that I know the capability of the troops types and the way that terrain works I would play differently next time.
Saturday, July 17, 2010
Warriors of God
Still reeling from a great World Cup! Visions of the beautiful game still fill my head but it is time to get back to wargaming. Paul and I decided to dip our feet a little further into the shimmering depth of hex and chit gaming by pulling out Warriors of God by Multi-Man Publishing, a member of their International Game Series. This game, created by Makoto Nakajima and Adam Starkweather, is of low complexity with a play time of about 2 hours (if you are conversant in the rules.) It attempts to simulate the Hundred Years War between the French and the English. The rules are 16 pages that are clear and well laid out. It only took me an evening to read the rules and follow along with the examples before I felt as though I had a good grasp of the important concepts. The components and map are high quality and sturdy but I would still recommend using a piece of plexiglass over the map to help keep it flat so you don't upset the counters during play. The game uses a number of battle dice (d6) to determine the outcome of battle. Not a lot of die modifiers to deal with so combat was fairly straight forward and clear. The game uses an impulse system and initiative to determine who goes when. Not hard to understand at all.
To the right is an example of one turn from the game. I don't quite

remember at what turn but this photo was taken but it gives a good example of what the map territories look like and a peek at the turn chart laid out on top. In this game leaders are THE thing, without them your troops will evaporate into the hinterlands with nary a whiff back. Each game turn is equal to 10 years so you can't count on leaders being around for more than about five turns so it is helpful to continue to look ahead to see what leaders are coming up in the following turns and position your existing leaders and troops in such a way as to allow the new leaders to enter the board and take command of troops as leaders can die from old age, battle or taken from the game by being captured.
This is basically an area control game where victory points are awarded for control of territories and captured leaders. The first to 30 (or 35) points is the winner. Territories have different victory point values which are informed by the roman numerals in the territories. The roman numerals do double duty as they also indicate the number of troops that can be raised from that area. The main type of troop is standard infantry but there is also knights, gunners and longbowmen but these are restricted in number, unlike the foot soldiers. Each turn more leaders enter the board and placement of them is critical especially if you have unassigned troops on the map. Each side has their own leaders but there are also unaligned leaders that can be used by either side. The assignment of the unaligned leaders is based on who didn't have initiative as they get first choice of any new, unaligned leaders.

Movement is simple enough and easy to understand and your troops can get around the board fairly easy. Stacking is allowed and each leader can command a number of troops corresponding differing numbers of stars on the leaders chit. Basically, they vary from commanding three to nine troops. Overall pretty simple mechanics that don't take a lot of page turning to apply, whether in movement, combat or game turns.
We started the game and within the first couple of turns the French were taking great expanses of the countryside due to fantastic dice rolls. The same couldn't be said of the English as there wasn't many options for movement and some terrible dice rolling. Due to the amount of territory controlled by the French their buildup of troops was quick and efficient unlike the English. The other thing that skewed the game is that the French kept getting the initiative and that is huge when it comes down to the number of leaders and troops that you can move. Basically if you win the initiative you get to move first and last in that turn. Kind of a big deal if you have a lot of troops to move. It also allows you to react more efficiently to your opponents movements or to move troops as a feint. In addition to the French's domination of the continent they were blessed with some good combat results that rocked the English not to mention the loss of the English king and no one to pick up the royal banner among the English leaders. In the end it came down to the French king taking a bunch of troops and knights as well as another leader with his compliment of troops invading England from Normandy and wiping out the English royal line. The victory point disparity was giant.
Couple of thoughts: There is a need to really plan ahead in this game. Leaders come and go and you need to be positioned to take advantage of their deaths or capture. The English really need a foothold in the continent early in the game or there is no way they can thwart the French land-lust. The English also need to really figure out how to leverage their longbowmen as they can make a huge difference in battle. Overall a fun game and one that I would like to revisit sometime soon. For those who are looking for a historical reenactment this might not be the game for you as the low complexity doesn't really allow for much granularity and it might seem a little simple. It was good for me to play this game especially as it gives me another perspective on wargaming and a different mode of play from my previous experiences.

Can you tell who Paul was representing?
Monday, July 12, 2010
Back in Action
Okay, now that the World Cup is over I can get back to this blog and gaming. The last month has only seen me play a couple of games and dab some paint on one miniature.
A couple of days ago I played another game of Combat Commander (Normandy battlepack.) This scenario saw the Americans trying to take the Pont du Hoc gun batteries. They were tasked with climbing the cliff and taking over six different bunkers. A daunting task as they could only advance up the cliff faces or get up with a special rule at the end of the time advance sequence. The Germans (who I played) were set up on the top of the cliff hunkered down in the bunkers with plenty of light and heavy machineguns as well as medium mortars. The Americans did well the first couple of turns as they got a goodly amount of leaders and troops up the cliff and successfully assaulted a bunker to establish a foothold. After that it was all downhill. They couldn't seem to get anything going and really felt the dearth of smoke grenade action and move orders. A couple of lucky white phosphorous events got some smoke out but by then there was a serious traffic control problem at the top of the cliff as the Germans gunned down American troops with impunity. From there the game quickly ended after victory points started adding up and time advanced to sudden death during round ten.
A good game for the Germans with a hint of payback from the last time that we played the map. Last time the Americans had a textbook, cliff-scaling, German-smashing scenario where most everything went their way.
Final thoughts on this scenario: Germans need to get their leaders up in the bunkers as soon as possible to be able to direct fire from the mortars and machineguns. They also must be able to move troops around quickly in order to respond to the Americans stacking up on one side of the map. The Americans need to get up the cliff as soon as possible and start tossing enough smoke so that at least some will remain on the map after a time advance. This is all important as it allows the Americans to move past the first captured bunker and attempt to assault or bypass the remaining bunkers to gain victory points. I think that spreading the American troops along both cliffs would have the greater effect of splitting the concentration of fire from the Germans across two fronts rather than loading one side down with troops and possible encountering traffic control problems when hexes become overstacked.
That game marked our 50+ play of Combat Commander and I am itching to delve into different types of hex and counter games. With that in mind I asked Paul to pick out a new game to play for our next session and he picked Warriors of God by Multi-Man Publishing. This looks to be a tasty little game that relies on area control and leans heavily on the use of leaders. Simple little rulebook that is well laid out and rules that don't look that hard to learn. Looking forward to it.
Sunday, June 13, 2010
Khador Painting II
Not much doing since Friday was the start of the 2010 World Cup in South Africa. Along with gaming, soccer is a real obsession in my life (as well as my lovely girlfriend and daughter.) So, I don't expect to get much done in the next couple of weeks when it comes to painting. Hopefully I will be able to get some gaming in as I would like to finally see Malifaux on the table as well as some more WARMACHINE. 

I did finally base Vlad and give him a shot of sealant. I am not very happy with the stuff I picked up this time. It seems to give the model a sheen. I bought Valsar Krystal Flat. It comes out in a serious blast and the mist is rather coarse. I felt that it made the coat blotchy and uneven. Might give it another try on a less humid day. Below is a picture of the finished Vlad and a Destroyer that I hope to finish before the Cup is over. I am really getting dialed into WARMACHINE especially since Paul is once again catching the fever. Per our agreement of having only painted models make an appearance in MKII I need to paint this Destroyer, Yuri the Axe and the mercenary Rheinholt so I can switch up my lists while I paint the larger units that I crave.
Thursday, June 10, 2010
Combat Commander Match

Played a game of Combat Commander tonight from the new Normandy Battlepack. The Battlepack comes with maps, counters, scenarios and special Normandy rules. We played the first scenario in the pack and it used new rules such as starshells and night modifiers. Some of the other rules in the pack that we didn't play with were dealing with things such as armor support, rural roads and swimming. There were around nine or ten new rules that were pertinent to Normandy. The new maps look fantastic like other Combat Commander maps and the chits were also standard fare including new commanders.
We played the Pegasus Bridge scenario, Germans v. British. The Germans were tasked with holding a bridge head surrounded by trenches and wire. There was an artillery gun and a pillbox to complete the defenses. The Germans had poor troops (conscript squads and green teams) and one leader. Reinforcements would arrive on the three or four time box. These were volksgrenediers and rifle squads as well as another commander. Would the weak troops survive in time for help to arrive? Could they hold the bridge?
The British enter the map from a glider so they must be in or adjacent to two specific hexes at set up. The Limeys, mainly paratroopers and elite teams, set up in two groups. One occupied some woods near the map edge and the other started rather forward in the open. Allies had to capture the bridge for victory points. The first couple of turns were the perfect storm for the British. They steadily advanced into and over some wire and stumbled into the front trenches after approaching under the cover of smoke. The most the Germans could do was minimal harassing fire and a little shuffling around of troops. The British machine kept rolling as they continued to assault and capture the infantry gun and pillbox as the Germans made a strategic retreat to the other side of the bridge and into some trenches. At this time it kind of turned into a stalemate with victory points shifting back and forth and the frontlines holding. Time passed and we forgot to do the night sniper at every time event for the entire game! Reinforcements arrived for both sides but the Germans were the only ones that got their reserves into the fight (although, it was mainly to die.) The momentum died around the seventh time box and ended on a sudden death on time marker nine. I could be slightly off about the end, hopefully Paul will correct me in the comments! British won with two victory points. It was a hard fought battle that stayed tight through most of the game. The British big push at the beginning was the keystone to cementing their victory because without that there was no way they could have made it to the trenches as the Germans were throwing out lots of illumination and had a steady hand of fire cards after the push. It is much easier to break those paratroopers when they are moving in the open under illumination.
Overall it was a very fun game that had just the right mix of back and forth to make it feel like you were always in the game. Being able to use Artillery cards was huge as it made cards that are a lot of the time useless have some worth. I am looking forward to see how the remainder of the new rules change the game play experience. I give Normandy Battlepack a 4 (out of 5) finger salute!
Khador Painting
 I have been working on this Vlad the Dark Prince model for sometime now. I really wanted to concentrate on my shading skills for this model and I think that I have exceeded my expections (which at times are really low!) I did four series of highlights for the red and blue along with 10 or 15 layers of ink glazing. I still think that I could work on easing the visual transition between layers but from distance it looks good. Just have to finish the face, metals and touch-up with black.
 How should I base him? Snow or forest?
Wednesday, June 9, 2010
Soviet SMG and Command
 Got my workspace all spruced up this morning in anticipation of painting up some 15mm Soviet SMG troops by Command Decision. Also have a couple random commander types in there that are holding binoculars or holding a pistol. I prepped these models for painting a couple of months ago but just ran out of steam when I finally got down to actually painting. I was in a frenzy during the late fall/early winter where I was painting almost a squad a day of Soviet infantry. These dudes were left over after I already filled out a platoon of infantry and support. These models are considered extra and would beef my forces if I wanted to play some bigger games. In finishing these models I am completing one box of infantry in this scale. Next up: More armour.
Here is a photo of the SMG troops primed and ready for paint. I use small 1/4" washers for the bases.

The command group primed. I like to use Army Painter Desert Yellow for the Soviet fatigues.

Getting some paint on now. I mainly use GW paints but also like P3 and Vallejo.
Didn't use a whole lot of colors. Fortress Gray, Boltgun Metal, Snakebite Leather, Elf Flesh, Chaos Black and Soviet Green (Vallejo)

All finished except for the basing and a quick coat of anti-shine varnish. I use the "dip method" on ordinary troops. Although it is not really a dip method as I put it on with a brush. I find that I can get more painted figs to the table when I use this production method.
I felt as though I had a productive day. These models have been lingering around and staring at me with a mocking countenance for months now. Finally put them in their place!
I have spent a lot of time over the past couple of weeks concentrating on painting WARMACHINE miniatures at the 28mm scale. It took me some time to adjust to this smaller scale and the way that I paint when I know that I am going to finish them by "dipping." A lot of the times it was just a swipe or two of paint on a figure and then move on to the next.
Next: Still a couple of things staring at me from the desk: Vlad, The Butcher, Warjacks (Kodiak, Spriggan and Destroyer) as well as a couple of Uncharted Seas fleets. The fleets are a real albatross around my neck. See a future blog post about my travails with Spartan Games.
Monday, June 7, 2010
Reinforcements II
 Just opened up the mailbox to a package containing
tanks and troops produced by Battle Honors. U.S. .30 Caliber MGs (6102),Mortars (6103), Infantry Command (6104) and Bazooka (6109) for the troop portion. In terms of armor, I received M4A3 Sherman 75mm (6067) and T34/85 Tank (3006). Thanks to evwargamer from bartertown.com, great price and lightning fast shipping.
One of my best friends says, "The price is so good, how could you afford not buy it?" This was such a case. These packs will join the others on the shelf which means they are later in the queue rather than earlier. I think I should be seeing them in a year or so!
Although they might jump ahead of the 15mm Germans as I have already painted up a lot of Command Decision models and I am anxious to gauge the difference between them and Battle Honors. Just on visual inspection Battle Honors seems to have a lot less flash.
Sunday, June 6, 2010
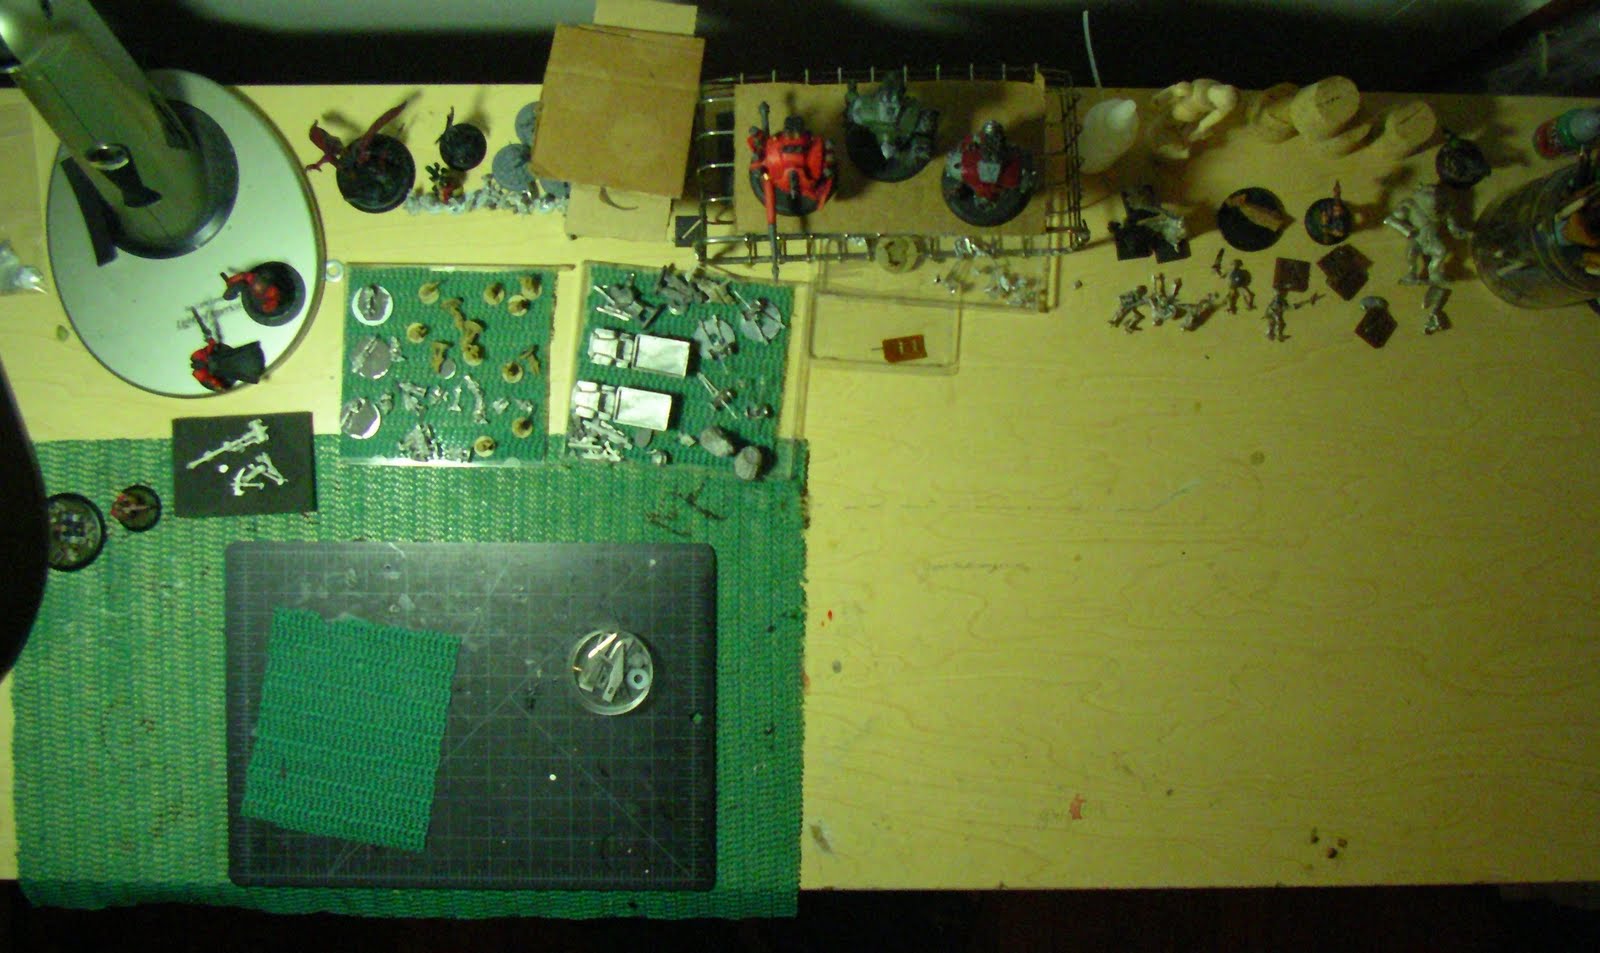
Workshop

Just a quick picture of my work space. I like to think that I can keep things neat and tidy but that only happens for a small time right before I start a new project or revive an old. I like to clean and organize the desk before I start in on a new endeavor.
Should be clean again soon as I am getting ready to grind out some work on an existing project. I feel like I should get to going on finishing up 28mm Vietnam range from The Assault Group or get those blasted Uncharted Seas Imperial fleet finished. Both have been lingering for some time I just can't seem to get the gumption to jump back into it, stalled out you might say.
Saturday, June 5, 2010
Warmachine Match

The big red machine does it again.
Just got done with a 25 pt. WARMACHINE match. It was a lot of fun because Paul and I have agreed to only put painted models on the table. It was even more fun because we have not played much WARMACHINE since the MKII announcement. Before that time we played every week. It took us a little while to get back into the swing of the game but once we found our confidence I feel like it was a smooth play. I still tend to forget little things, like allocating focus. I get to looking ahead at the fantastic chain of events that I have lined up and start moving models around. The next thing you know I am looking to the 'jack for it's part in the drama and lo! and behold! the damn thing is out of coal and water, just kind of limping around taking weak swings at infantry instead of laying it's steel mitts around another 'jack's neck while burying an ice axe in it's face. Other than that it was fun to dust off some old models and show off the newer stuff I have been painting in my anticipation of more WARMACHINE games. Feels great to have a painted army on the table, seems as though they move in greater harmony under my commanding hand! HAHAHAH!
It was a knock-down, drag out, in the dirt, down to the last man, type of game. That kind of fight is why I fight with WARMACHINEs.
For the Motherland!
 Near the end for ole' Stryker
The image quality of the photos is really poor on my cellphone. Maybe I will be smart enough to pack the real camera next time.
Friday, June 4, 2010
Reinforcements
Just paid for some 15mm Quality Castings miniatures that I found on Bartertown.com. Got six packs of various American infantry and tanks as well as one pack of Soviet T-34s. I use these figure with a group of WW II rules such as Disposable Heroes and Nuts! My main focus on collecting and playing this genre has been on the Soviets. I have almost an entire company of infantry completed. In addition, I have ten pieces of armor and trucks. I originally wanted to play the Americans as Paul was collecting Germans. I just happened to run into a great deal on the Soviets and couldn't pass it up. I am glad that I did as it has given me a chance to learn a whole different perspective and appreciation of a part of history that I knew little about.
Welcome
I have been looking at different blogs for a couple of years now. Some are good, some not so good. Some have frequent updates others languish for months without an entry. I hope to take some of the good and leave the rest as I feel my way through the blog-o-verse. I guess I want to do this to chronicle some of my gaming adventures. I will leave the real-life adventures for another blog.
Gamer cred: Started with red-box D&D but maybe not because I threw the box away after I opened it! A blue cover book with a dragon on the front. From there moved onto Middle Earth Role Playing, Champions, Traveller. I even went to a week long residential D&D camp! Around high school there was this hot new company that made some awesome figures (big, chunky bits!) called Games Workshop (is that copyright infringement?) Got into the fantasy pretty heavy, I played the elves, Kris had the dwarves, Paul had chaos and Matt played humans (?) I don't think that there was 40k at that time. After I graduated high school I joined a RPG group at the university and we played some D&D but I really don't remember all that much as I only attended a couple of times and I was more interested in girls and illicit substances at that time! At that point my gaming tapered off and died.
Pick it back up some years later when I happened to see Warhammer Quest at the local game store (in Boulder, CO). Life had settled a little for me as I had a kid on the way at the time so me and babymomma played Warhammer Quest a lot along with a new-fangled card game called Magic: The Gathering. All that slowed down when I decided to go back to college and actually get a degree in something other than girls and booze.
Fast forward a couple of years to 2006 when Paul introduced me to Warmachine. Instantly hooked. Liked the small model count, like the sculpts, liked the fluff. At the time I said to myself, "Don't get all heavy into this game." I listened to myself for about 2 months then started to collect 2 factions, Menoth and Khador. That little bit opened the door for more gaming to come flooding in. So now I boardgame, wargame, cardgame and hobbygame. I am pretty well obsessed and like to paint and read up on rules when I am not playing. As you can tell I have been in and out of the hobby for nearly 25 years. So this blog will hopefully chronicle my painting and playing in the realm of gaming.
Subscribe to:
Posts (Atom)